
In this lecture, we will Learn how to download & install MySQL 8 database on Windows 10 Step-by-Step! If you are using different operating system, like Win 11, macOS or Linux Ubuntu ETC. You can check out following MySQL 8 installation tutorials.
MySQL Installation on Windows 11
MySQL Installation on macOS
MySQL Installation on Linux Ubuntu
Before we start learning SQL/MySQL, we will require MySQL database server installed on our local computer. So that we can practically write and execute SQL statements. In this lecture, we will step-by-step learn how to download & install MySQL database server on a computer running Windows 10 operating system.
Please Note: In this tutorial, I’m using Windows 10 64 bit operating system and MySQL Community Server 8.0.26 version. If you are using a different version of Windows like Windows XP, Windows Vista, Windows 7, Windows 8 etc. OR newer version of MySQL, the installation steps might slightly vary. If so, you can ask me questions in the comments section of this page below.
Step A) Download MySQL 8.0.26 Installer
The very first thing we need for the installation is off-course MySQL installer. You can either directly download MySQL from the following link or go to official MySQL website and go to downloads page step-by-step.
Option 1: Download installer from direct link
Download MySQL Community Server 8.0.26 installer file directly! (Release Date: 2021-07-20)
The latest release might contain bugs or may not support all computers. If you encounter installation errors, I would recommend you to download previous stable release from following archived versions link,
MySQL Installer (Archived Versions) URL
Option 2: Get installer step by step from MySQL website
In your web browser open the official website of MySQL acquired by Oracle Corporation in 2010.
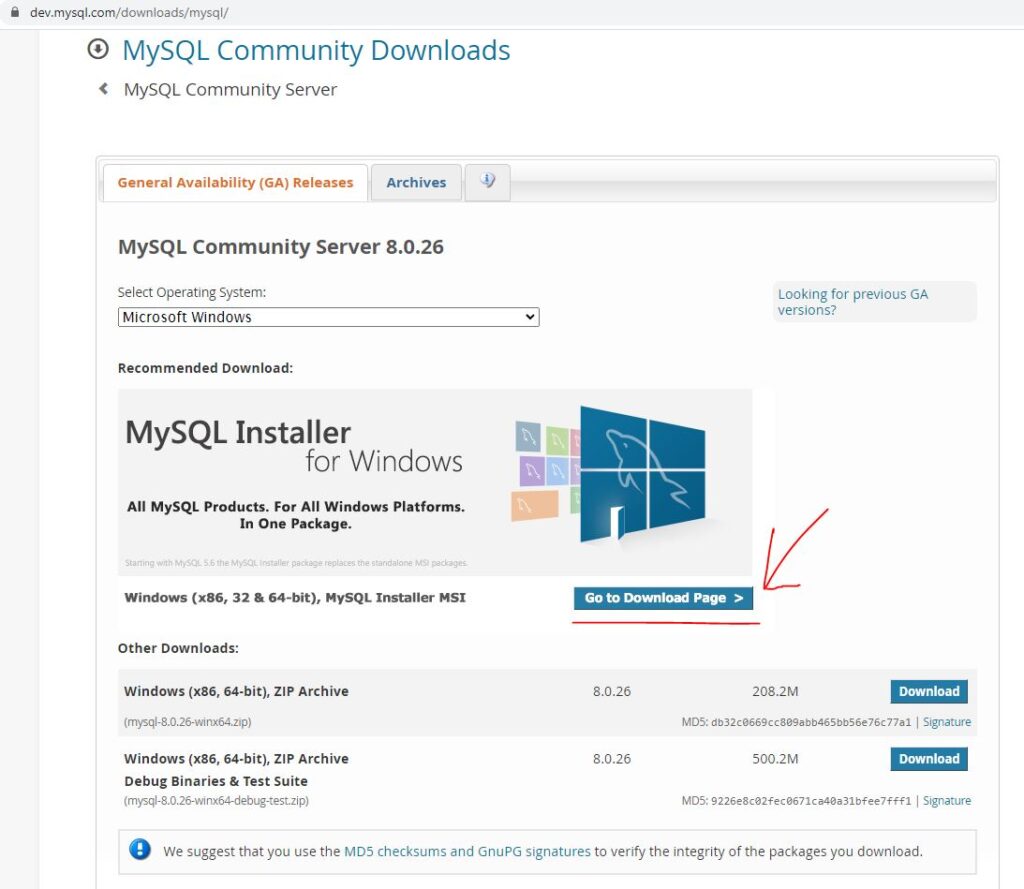
Under the downloads menu, you will find “MySQL Community Edition (GPL)” heading followed by download link. Click the link to open “MySQL community downloads” page.

On “MySQL community downloads” click “MySQL Community Server (GPL)” link to open download page.
On MySQL community server page, from “select platform” option, select “Microsoft Windows” and under “Recommended Download” title, you will find MySQL Installer link for Windows. Click “Go to download page” link to open the installer download page.
Please Note: There are zip archives files on this page. The installation step using zip archives files are different. May be we will learn it in a separate lecture.
Now, on Windows installer download page. You’ll find latest MySQL installer or Generally Available (GA) Releases.
Again, on this page, if it’s not already selected, select “Microsoft Windows” from select operating system drop-down option. And click the “download” for the MSI installer with large file size.
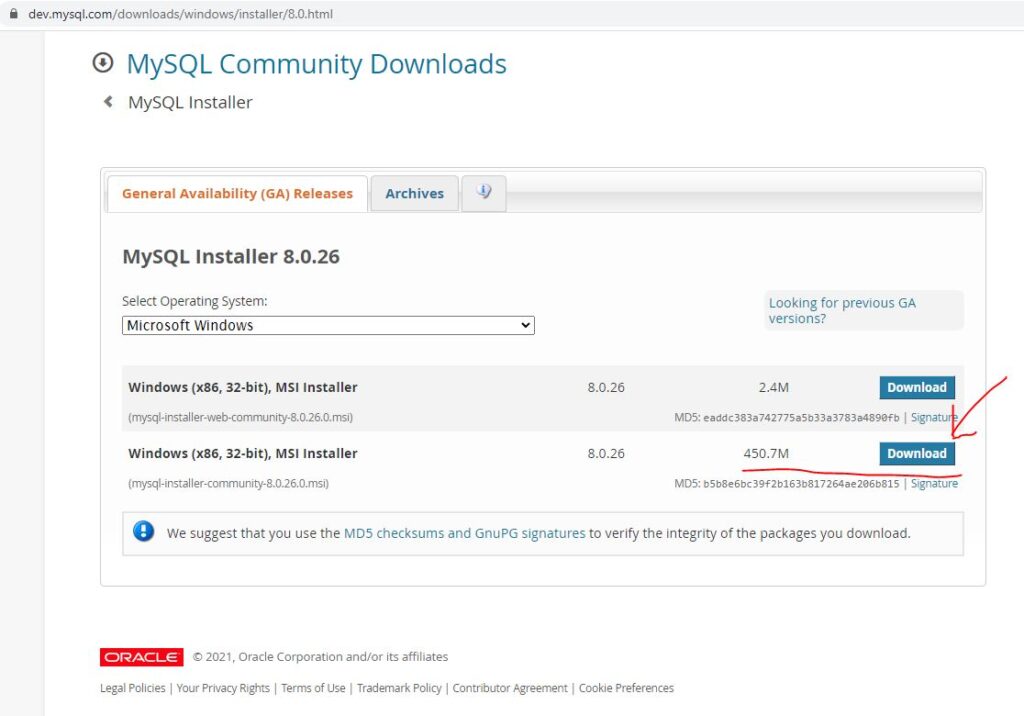
Please Note: There is no 64 bit installer, though I’m 64bit operating system, I’ll go ahead & download 32bit MSI installer. The 32bit installer will work fine!
On the next page, If you want, you can signup for an Oracle Web account. This is an optional step and we can skip it by clicking “No thanks, just start my download” link. Now, save the file to your computer.
Step B) Install MySQL 8.0.26 Database
Step 1: Start Installation
Double click the installer to start the installation. The installer will extract the files in the background and launch the installation in a couple of minutes or less. If you get windows security message like, “Do you want to all this app to make changes to your device?”, click Yes. On the installation window, accept the license terms. Select “I accept the license terms” check-box and click next.
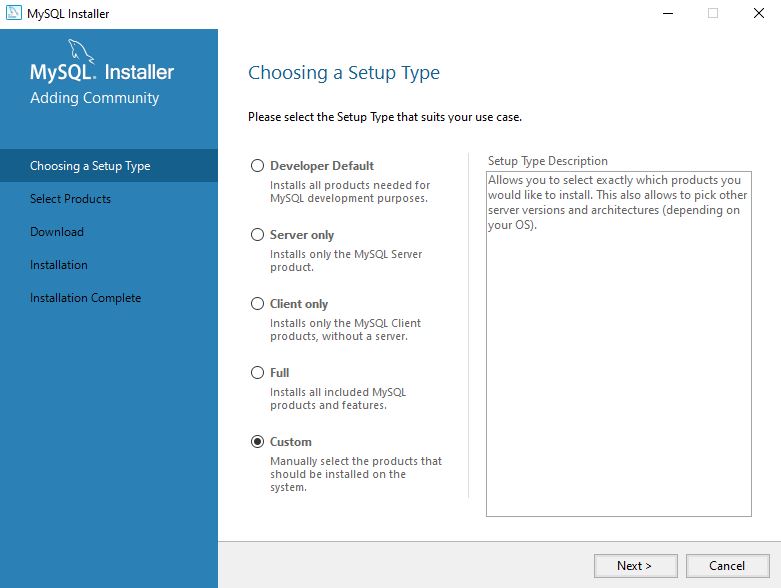
Step 2: Choosing Setup Type
On the “setup type” window there are five different setup types. The “developer default” type will install all MySQL products for development. The products like MySQL server, MySQL shell, MySQL router, MySQL workbench and so on. The “server only” option will install only MySQL server, while “client only” option will install MySQL client products used to connect to MySQL server. The “full” install type will install all the products and features available with the installer. We will select “Custom” type of setup so that we can customize the products and the path for the installation. Click Next.
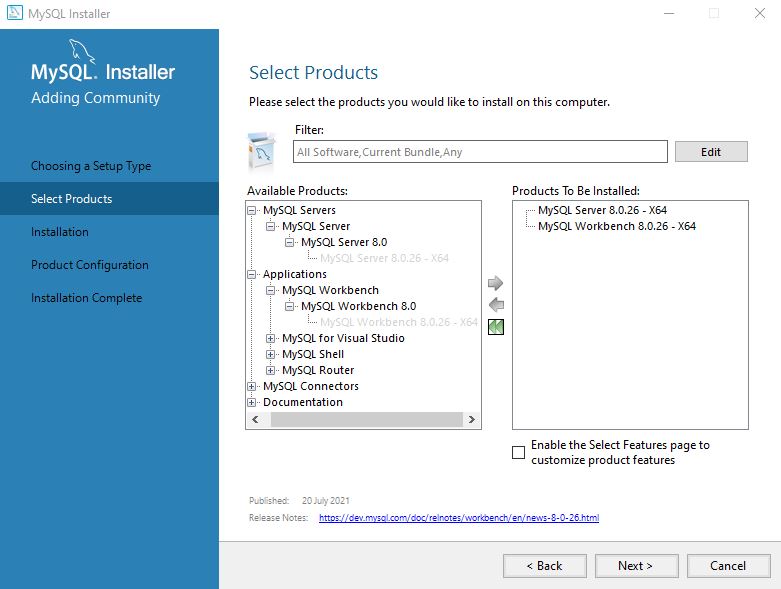
Step 3: Select Products
On select product window, left side column have available products for the installation. Click the plus sign in-front of “MySQL Servers”, Under “MySQL Server” and “MySQL Server 8.0” and select “MySQL Server 8.0.26 – X64”. Once you select the MySQL Server version, make sure you click this green right arrow, which will include the selected software in the installation. In case, you accidentally chose wrong version, you can select the product which is going to be installed and click green left arrow to remove it from the installation. Follow the same steps for “Applications” and “MySQL Workbench”. we’ll choose “MySQL Workbench 8.0.26 – X64” version. Don’t worry with rest of the applications, we will only use, MySQL server command line client tool and MySQL workbench. Click next.
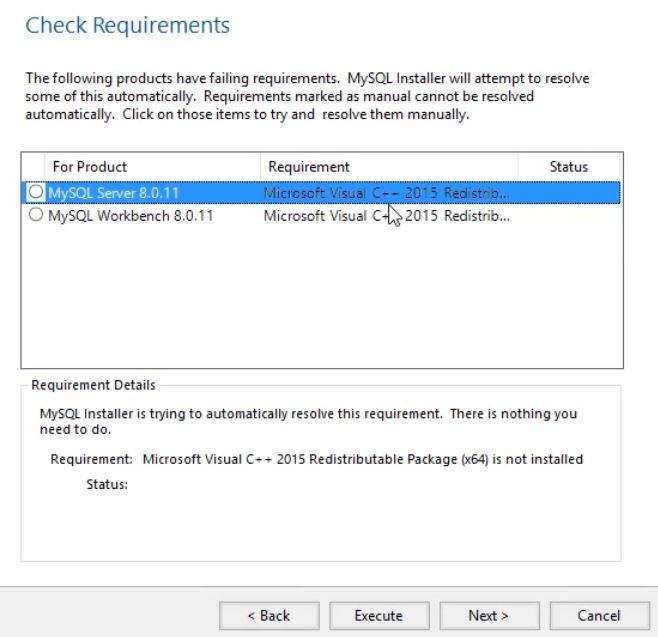
Step 4: Check Requirements (Optional)
Depending upon pre-installed softwares you may or may not require to install other essential software. If you see a “Check Requirements” window suggesting to install “Microsoft Visual C++ Redistributable”. Then, select the product and click “execute” button to install necessary packages. Once the required packages are installed, click next.
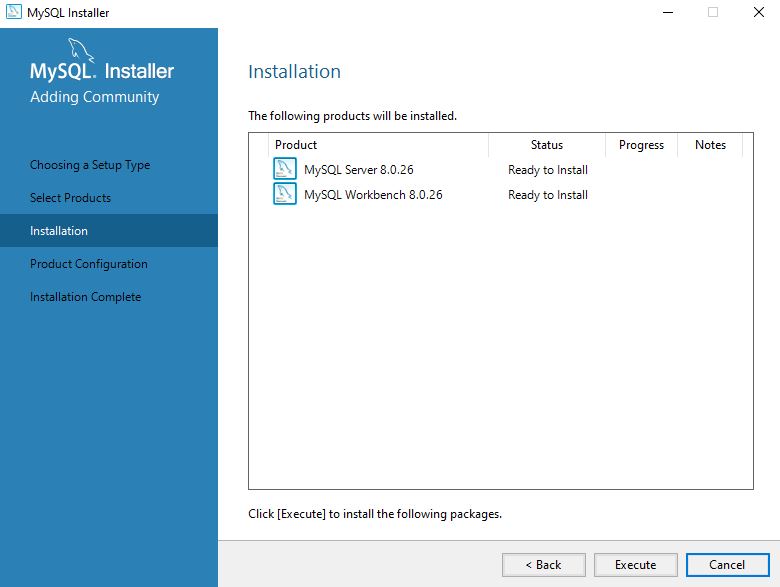
Step 5: Execute Installation
Now the setup is ready to install the selected products. That is MySQL Server 8.0.26 and MySQL Workbench 8.0.26. Click the “execute” button.
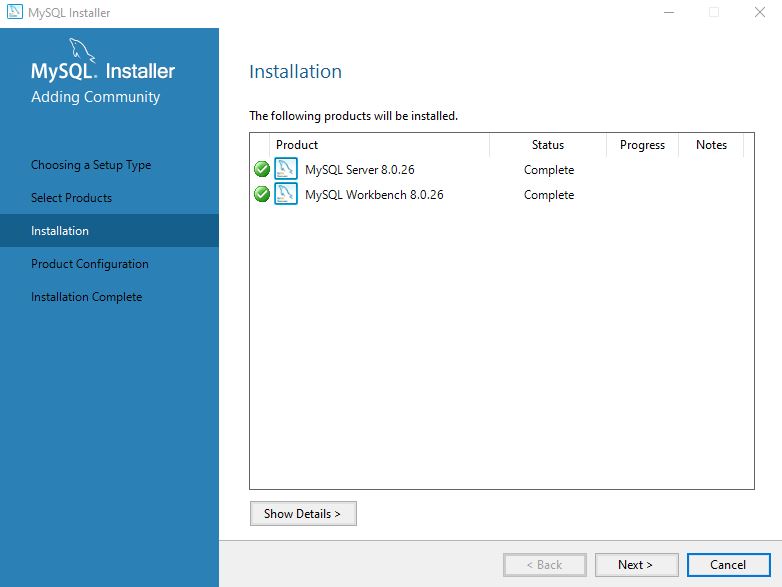
Step 6: Product Installation Complete
It will take a couple of minutes or less to complete the installation. If both products were installed successfully you’ll get the status as “complete”. Click next to start product configuration.
Step C) MySQL Database Configuration
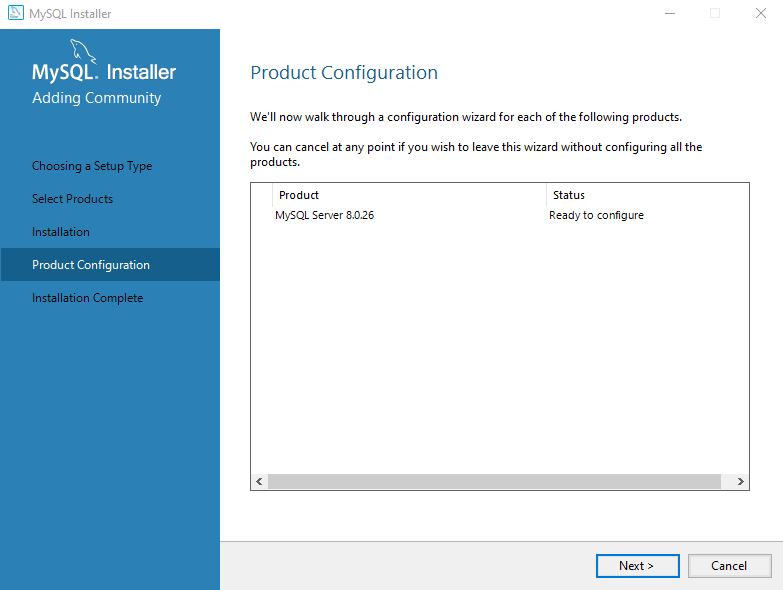
Step 7: Product Configuration Window
On Product configuration steps, we can setup MySQL port number, root user password and much more. Click next to start product configuration.
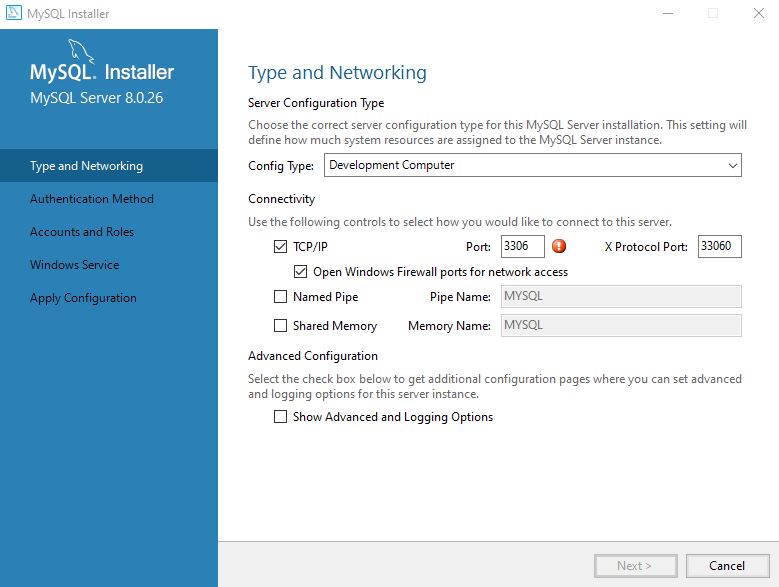
Step 8: Type and Networking
On Type and networking window under “config type” select “Development Computer”. The development machine uses minimum amount of memory. Server and dedicated machine options are mainly used for web servers.
Some applications or computers use IP address and port number to connect to remote host for data exchange. By default MySQL is assigned a port number “3306”. In case you already have installed MySQL on your computer, you’ll see a red mark near port field. It means the port number 3306 is already in use. In that case, you can change the port number to other than 3306. In my case, as the port number 3306 is already in use, I’ll enter port number 3307.
All the other options are fine. Click next to proceed.
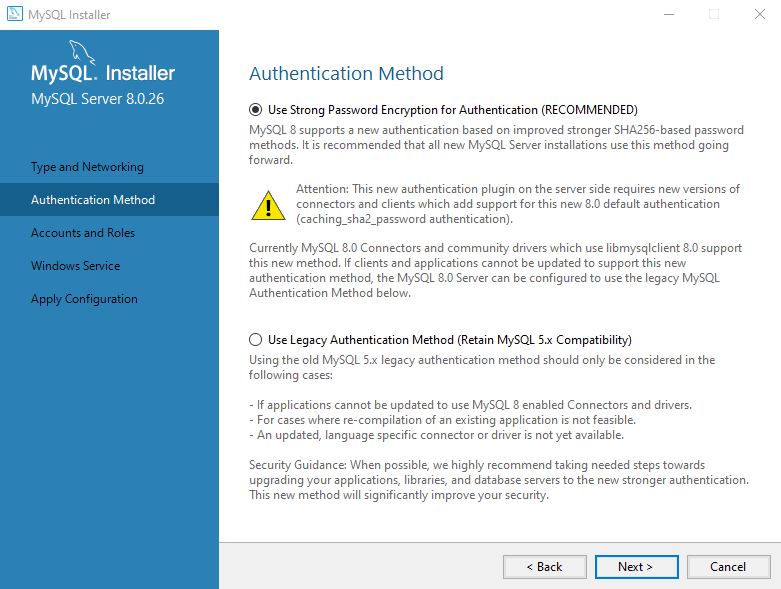
Step 9: Authentication Method
By default MySQL creates a username called “root” users which acts as an administrator for all MySQL databases. In order to login as a root user and access administrator privileges. We will require to set root user password.
From MySQL 8.0 we gets two option for “Authentication Method”. The new “Use Strong Password Encryption for Authentication (RECOMMENDED)” option uses strong SHA256 based password which uses latest encryption algorithm to protect the password. While the second option “Use Legacy Authentication Method (Retain MySQL 5.x Compatibility)” is used to support previous MySQL version password. Select the latest & recommended authentication method and click next.
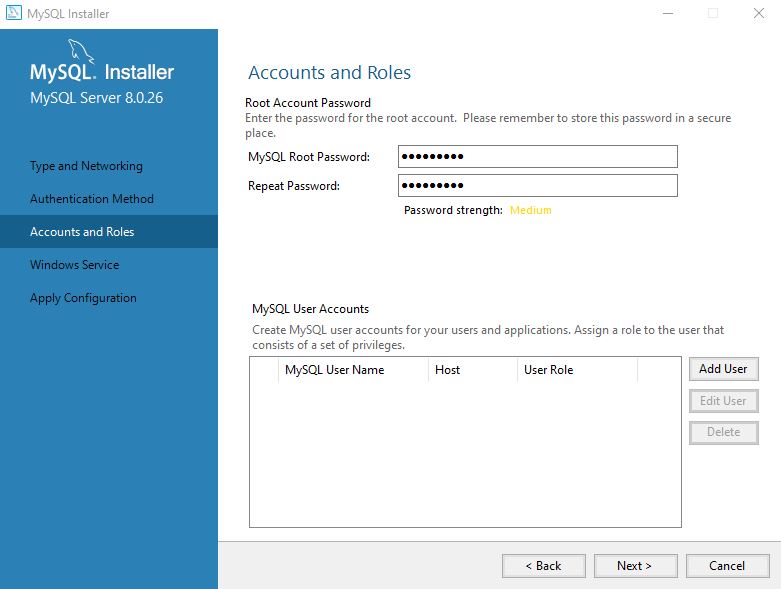
Step 10: Accounts and Roles
On “Accounts and Roles” window, set root user password. Make sure you remember this password and note it down somewhere. We will require this password to login to MySQL server. You can use a combination of capital letters, small letters, numbers & symbols to strong password. Since, we are on local computer, I’ll set a medium password. Make sure you enter “MySQL Root Password” and “Repeat Password” fields correctly. Only then, “The passwords do not match” icon will disappear and you can proceed.
From “MySQL User Accounts” section you can add more users. This step is optional and we can do it later, so let’s skip and click next to proceed.
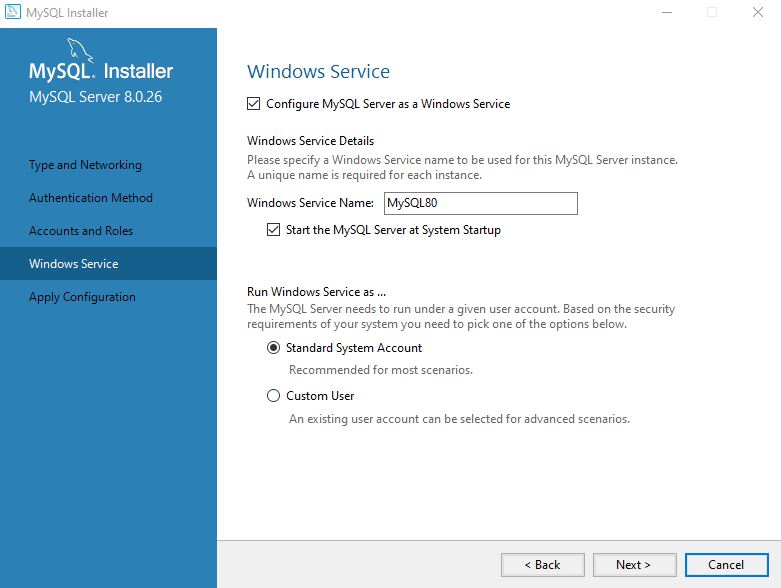
Step 11: Windows Service
On “Windows Service” window, make sure you’ve selected “Start the MySQL Server at System Startup” check box, and click next.
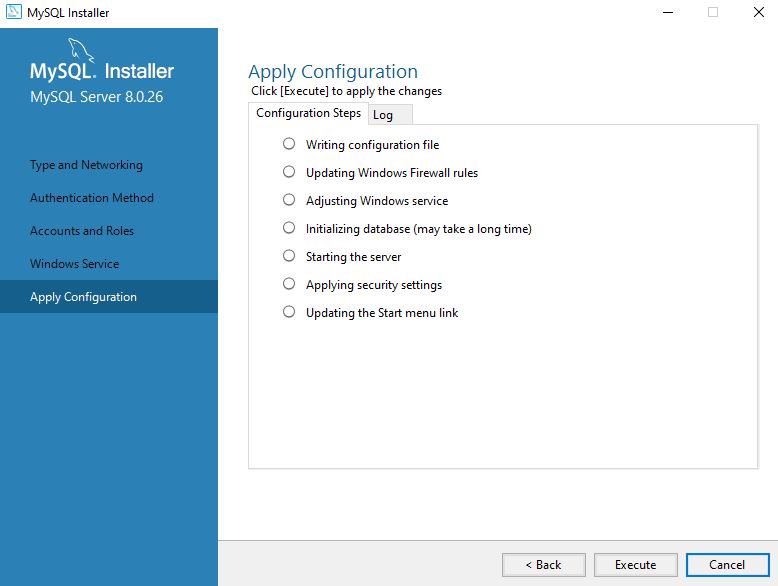
Step 12: Apply Configuration
The “Apply Configuration” window is just to confirm and proceed. If you think, you missed something, you can click back button and change configuration settings. If you are sure, click Execute button and apply configuration settings. It would take a couple of minutes or less to apply MySQL configuration.
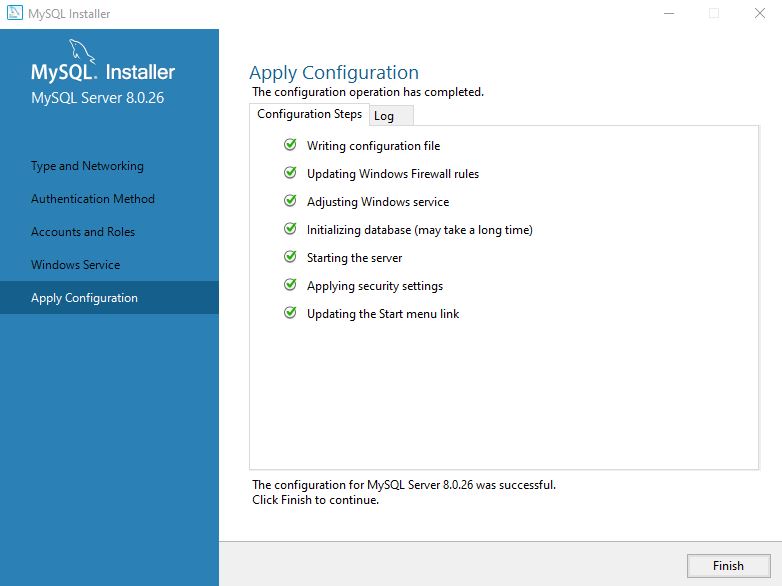
Step 13: Apply Configuration Complete
The “Initializing database” step may take more time (depending on your computer configuration). So be patient and wait for the step to complete.
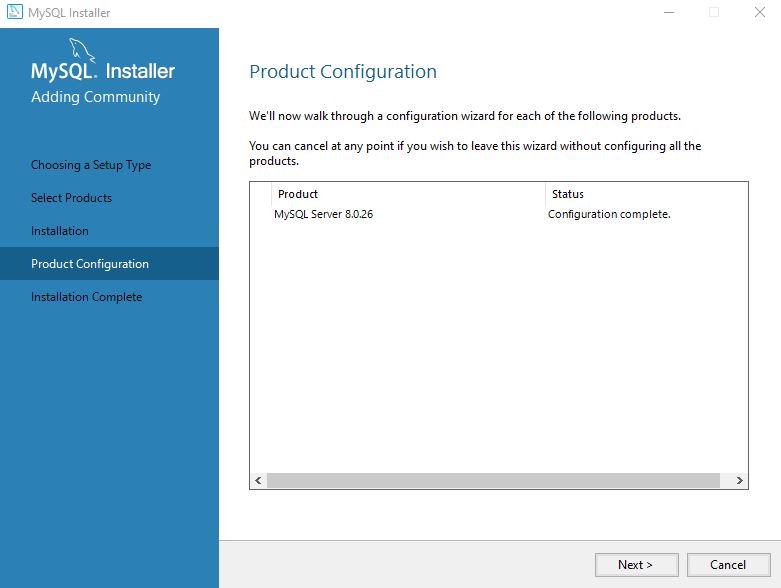
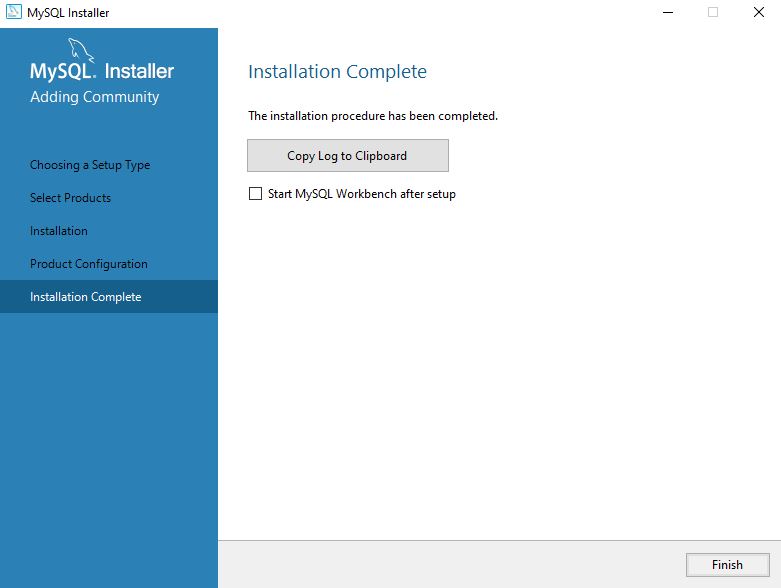
Once you see a green check box for each step, and all the steps are completed successfully, click “Finish” button to proceed to Product Configuration complete window. Click next and un-check “Start MySQL Workbench after setup” check box, and click “Finish” button to complete MySQL server installation.
Step D) Confirm MySQL Installed Successfully
Let’s confirm if our MySQL server and MySQL Workbench are successfully installed and working properly.
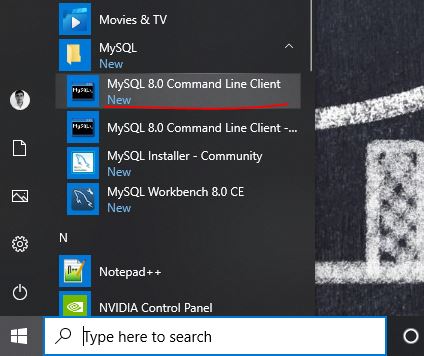
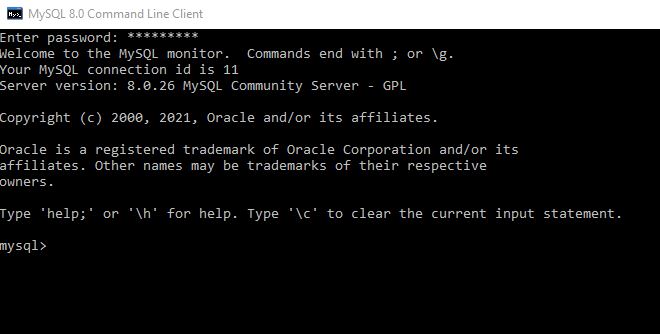
Start MySQL Command Line Client
Go to start menu and under “all programs”, click MySQL drop-down and click “MySQL 8.0 Command Line Client” menu to open MySQL server. Enter the root user password you set while configuring MySQL server. If you enter correct password, you’ll be logged in to MySQL server and you can see the server version information and MySQL prompt, where you can enter & execute SQL statements.
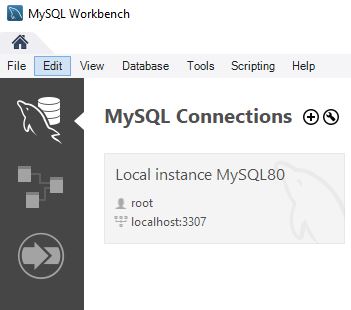
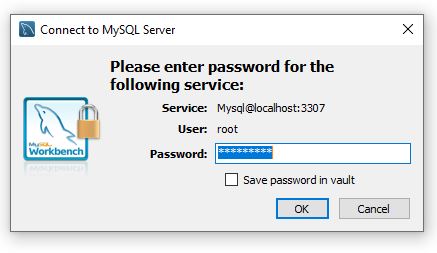
Start MySQL Workbench
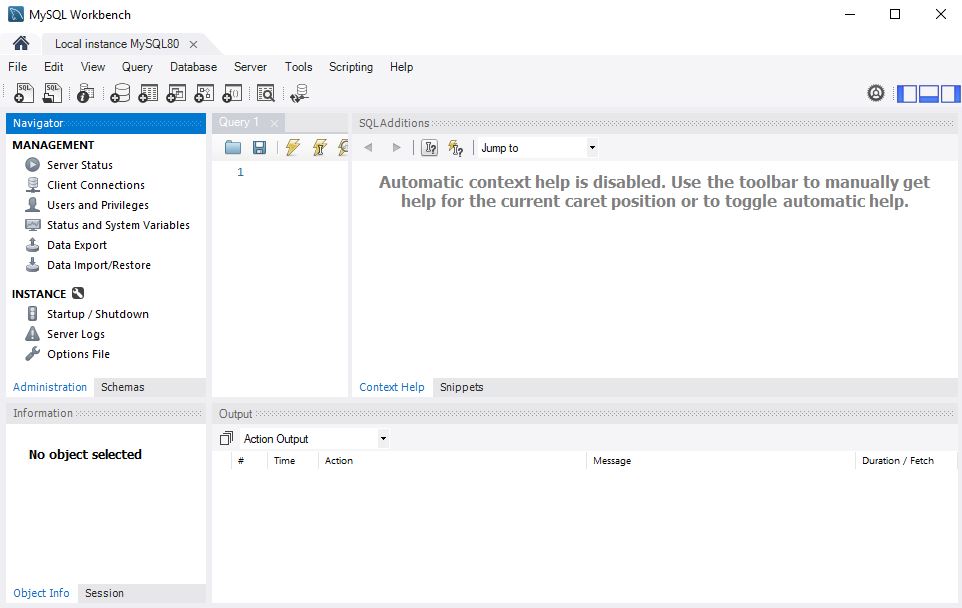
Go to the start menu and under “all programs”, click MySQL drop-down and click “MySQL Workbench 8.0 CE” menu to load MySQL workbench. From MySQL workbench window under MySQL Connections click and select “Local instance MySQL80”. On the next popup window, enter root user password. If you enter correct password, you would be logged in to MySQL workbench and see the workspace window as shown in the screen shot.
Step D) Troubleshoot Errors!
It’s OK! If you encounter installation errors or didn’t understand something. It’s part of the learning process. You can ask me questions here in the comments section or on my YouTube channel. I would do my best to help you ASAP. Usually, I respond within 24 hours.
Step E) After Successful MySQL Installation, What’s Next?
Off-course! The next thing is to learn SQL statements in MySQL DBMS environment. Check out other SQL statements tutorials on PnTutorials website or PnTutorials YouTube channel.